5 Power Automate Flows Every SharePoint Admin Should Build
Practical, immediately usable automation workflows that reduce manual work and improve document governance — with step-by-step setup notes.
Practical, immediately usable automation workflows that reduce manual work and improve document governance — with step-by-step setup notes.
Power Automate and SharePoint together form one of the most underutilised combinations in Microsoft 365. Organisations pay for Power Automate as part of their M365 licence but leave it untouched while staff manually chase approvals by email, forget to review expiring contracts, and spend hours on onboarding tasks that could be automated in an afternoon. These five flows fix the most common manual bottlenecks in SharePoint-heavy environments.
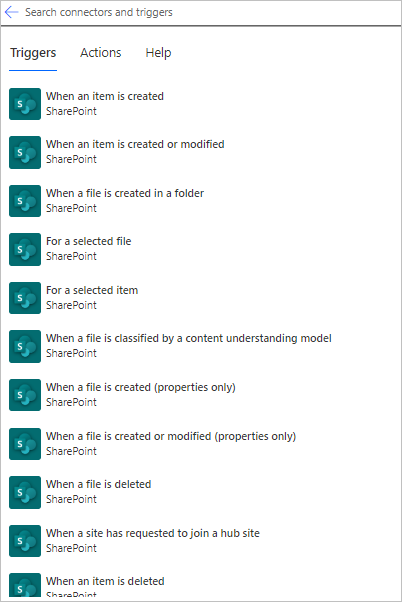
Go to powerautomate.microsoft.com > Create > Automated cloud flow > select a trigger (SharePoint trigger like 'When an item is created' or 'When an item is modified'). Name your flow.
Select your SharePoint site and list. Set any filtering conditions (e.g., 'Only trigger for items where Status = Pending'). Configure trigger frequency if needed. Click Create.
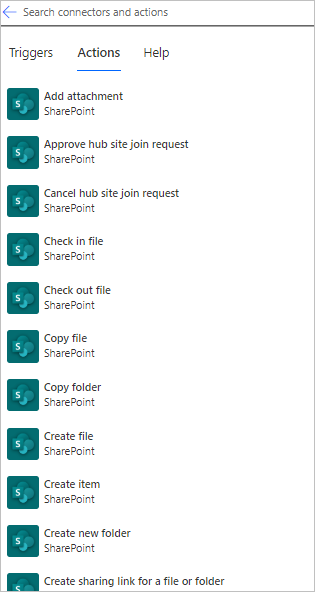
Add actions like 'Get file properties', 'Update item', 'Send email', 'Create event in calendar', or 'Post to Teams'. Each action pulls data from the trigger using dynamic content tokens like @{triggerOutputs()['body/ID']}.
Add 'Condition' actions to branch logic: if Status = Approved, send approval email; if Status = Rejected, move item to archive. Use comparison operators (is equal to, contains, greater than).
Add 'Configure run after' to the final action to catch failures. Set it to run if the previous action 'has failed' or 'has timed out'. Log errors to a Teams channel or email for visibility.
Save and test the flow by manually creating a SharePoint item. Monitor the flow run history in Power Automate to confirm all steps executed. Adjust actions and conditions based on real results.
Power Automate flows have three parts: a trigger (what starts the flow), conditions (optional logic), and actions (what happens). SharePoint triggers include "When an item is created," "When a file is created," "When a file is modified," and a recurrence trigger for scheduled flows.
All five flows below require a Microsoft 365 business licence that includes Power Automate (Business Basic, Standard, Premium, or any Enterprise plan). Build and test in the Power Automate maker portal at make.powerautomate.com. Always test with a sample item before turning on flows that send emails or modify data.
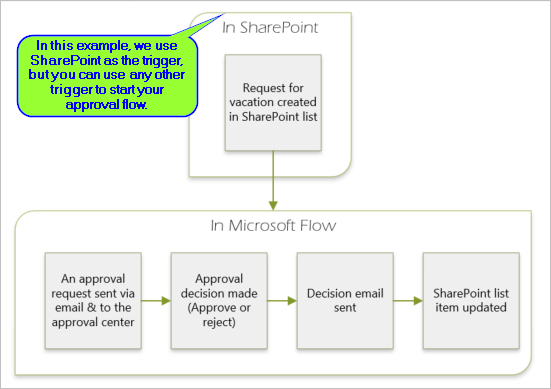
The most common SharePoint workflow request. Without automation, approval requests get lost in email threads. This flow creates a structured, auditable approval chain.
Pro tip: Add a 3-day timeout on the approval action. If no response is received, send a reminder email and re-request. If still no response after 5 days, auto-escalate to the manager's manager.
Contracts, certifications, licences, and policies all have expiry dates. Without reminders, they expire unnoticed. This recurrence-triggered flow runs daily and catches expiries before they become problems.
Manual onboarding can take HR and IT several hours per new employee. This flow reduces the repeated coordination work and gives every team the same checklist, timing, and audit trail.
Pro tip: Add a parallel branch that sends notifications to IT, payroll, and facilities simultaneously — each with only the fields relevant to their role — rather than one long email to everyone. For an in-depth look at the site provisioning step, including self-service intake forms and approval gates, see our SharePoint site provisioning automation guide.

Stale content is the enemy of SharePoint search quality and governance. This flow surfaces neglected documents before they become compliance risks.
For high-value decisions — budget requests, policy exceptions, vendor contracts — single-approver flows aren't sufficient. This pattern enforces accountability with automatic escalation.
We design and build production-ready Power Automate workflows scoped to your specific processes — with error handling, testing, documentation, and knowledge transfer included. Start with a free 60-minute consultation.
Book a Free Consultation →The five highest-value flows are: document approval with email and Teams notifications, contract expiry reminders triggered by a date column, new employee onboarding triggered from an HR list, stale content alerts for libraries not updated in 90+ days, and multi-level escalation approvals for sensitive documents.
Yes.
The SharePoint connector includes 'Get items', 'Get item', 'Create item', 'Update item', and 'Delete item' actions. You can filter items using OData queries, update specific fields, and work with attachments — all without writing any code.
Use the 'When a file is created (properties only)' trigger on your document library.
This fires for new uploads and provides the file metadata. For files created in subfolders, enable the 'Include subfolders' option in the trigger settings.
Common causes: the flow is turned off, the trigger is on the wrong site or library, the triggering user is the flow owner (owner-triggered flows can sometimes self-suppress), or throttling from high list activity.
Check the flow's run history in Power Automate for the exact error. Also verify the flow has permission to access the SharePoint site.
Editing and saving a flow creates a new version. Approvals that started on the old version continue running on that version until they complete or time out.
New triggers use the new version. Avoid editing flows with many in-flight approvals — instead, build a v2 flow and turn off the old one after in-flight runs complete.
OceanCloud specialises in SharePoint consulting, M365 migration, Power Platform solutions, and enterprise governance. Let's discuss how we can help.
Book a Free 60-Minute Consultation ➜Common patterns, error handling, and performance tuning guide.